
The New Canva Image Editor
Post by Amina Delali, June 19th,2023
What is it?
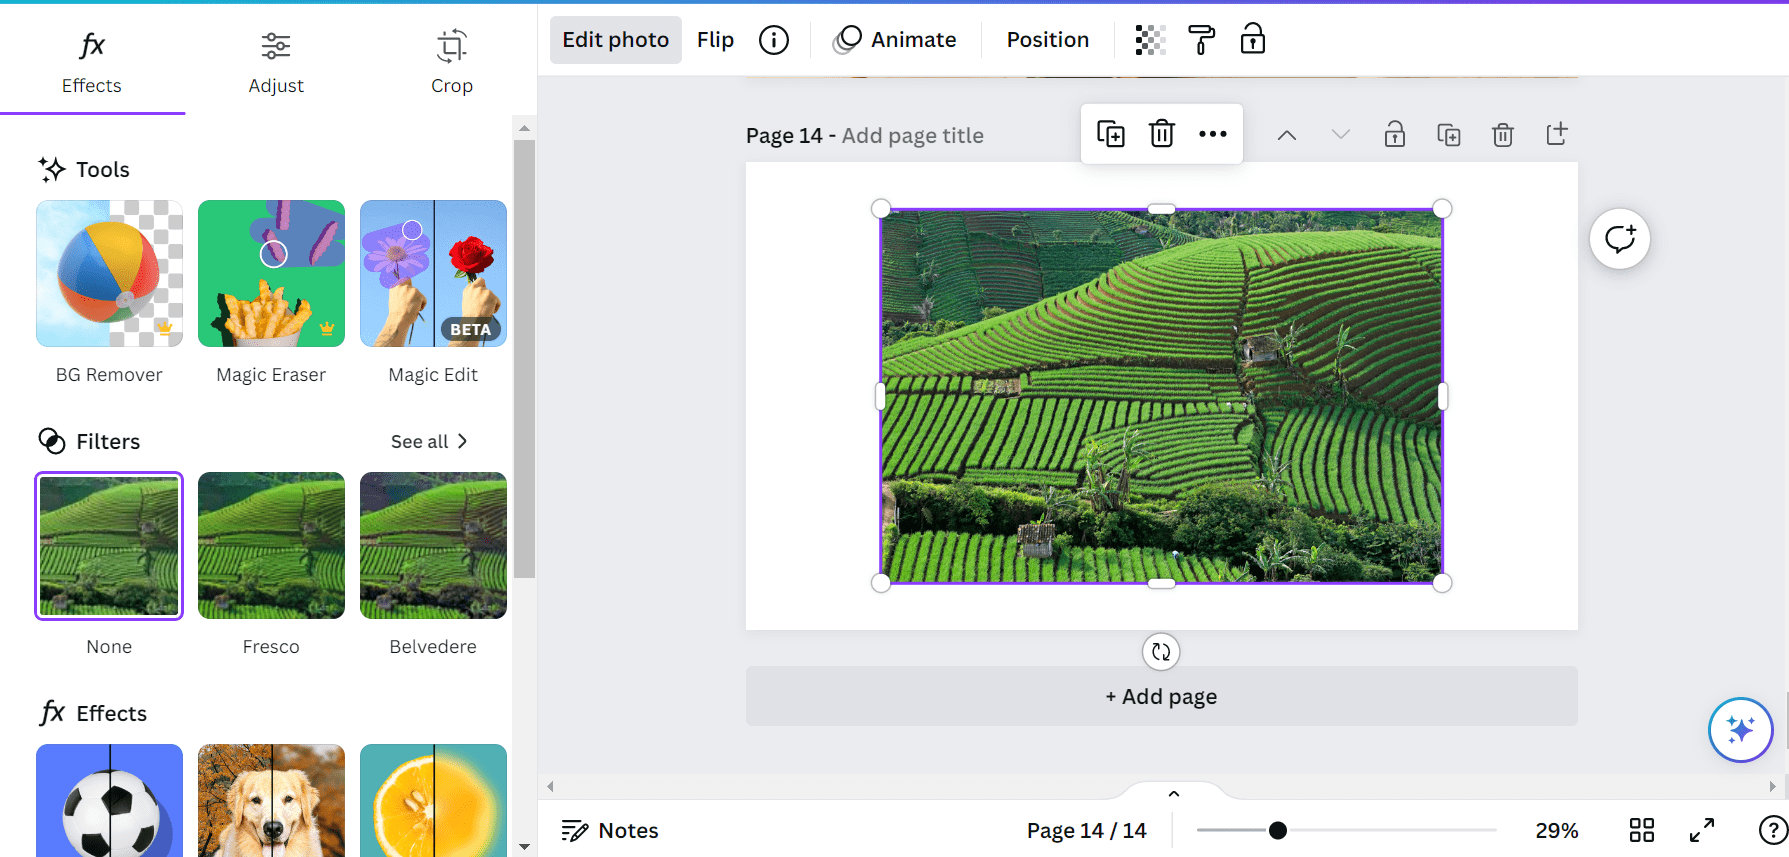
You may already know that Canva changed its image editor. The new one combine new features with old ones, in a more organized and simpler way.
So, when you add an image (a photo) to your design's canvas, the edit photo button appears. When you click on it, you will have access to a multi tabs menu:
- Effects: they are organized in 4 categories:
- Tools: you can call them magic tools. They rely on AI to bring you the best results possible. Two of them are available only in the pro version: the background remover and the magic eraser. The third one; Magic edit, is free. This one is particularly interesting, since you select a region, you entre a text prompt, and the selected region will be replaced by a design created from the entered prompt.
- Filters: they are simply regular images filters that you can apply on any photo. You can select a filter, specify an intensity, and your photo will change accordingly.
- fx Effects: this category is organized in 4 fx effects:
- Shadows: you have a choice between two types of shadows, and an outline. They are all customizable.
- Auto Focus: you select a focus position, and a blur intensity, and your photo will magically change reflecting the new selected focus.
- Blur: simply apply a blur to your photo, with an intensity ranging from 0 to 100.
- Duotone: it acts like the previously talked about photo filters. The difference is that it renders a photo with only 2 tones. You have of course, a set of tones to select from.
- Apps: in the apps category, you can find the Mockups app. Its principle is simple. You select a specific mockup, where the future image position is shown. Then you apply it to your photo. Its like using frames that are included in a bigger image.
- Adjust: this tab is related to adjusting the image coloring and appearance, by either clicking on Auto-adjust. Which magically adjust your photo coloration. Or, you can do it manually. By selecting the area of your image to change (whole, foreground, or background). And then adjusting one (or all) of these elements:
- white balance
- light
- color
- texture
- Crop: again, you have a magic smart crop, that will suggest and apply a crop for your photo automatically. Or you can do it manually, by selecting one of the aspect ratio available, as well as a rotation.
How to use concretely?
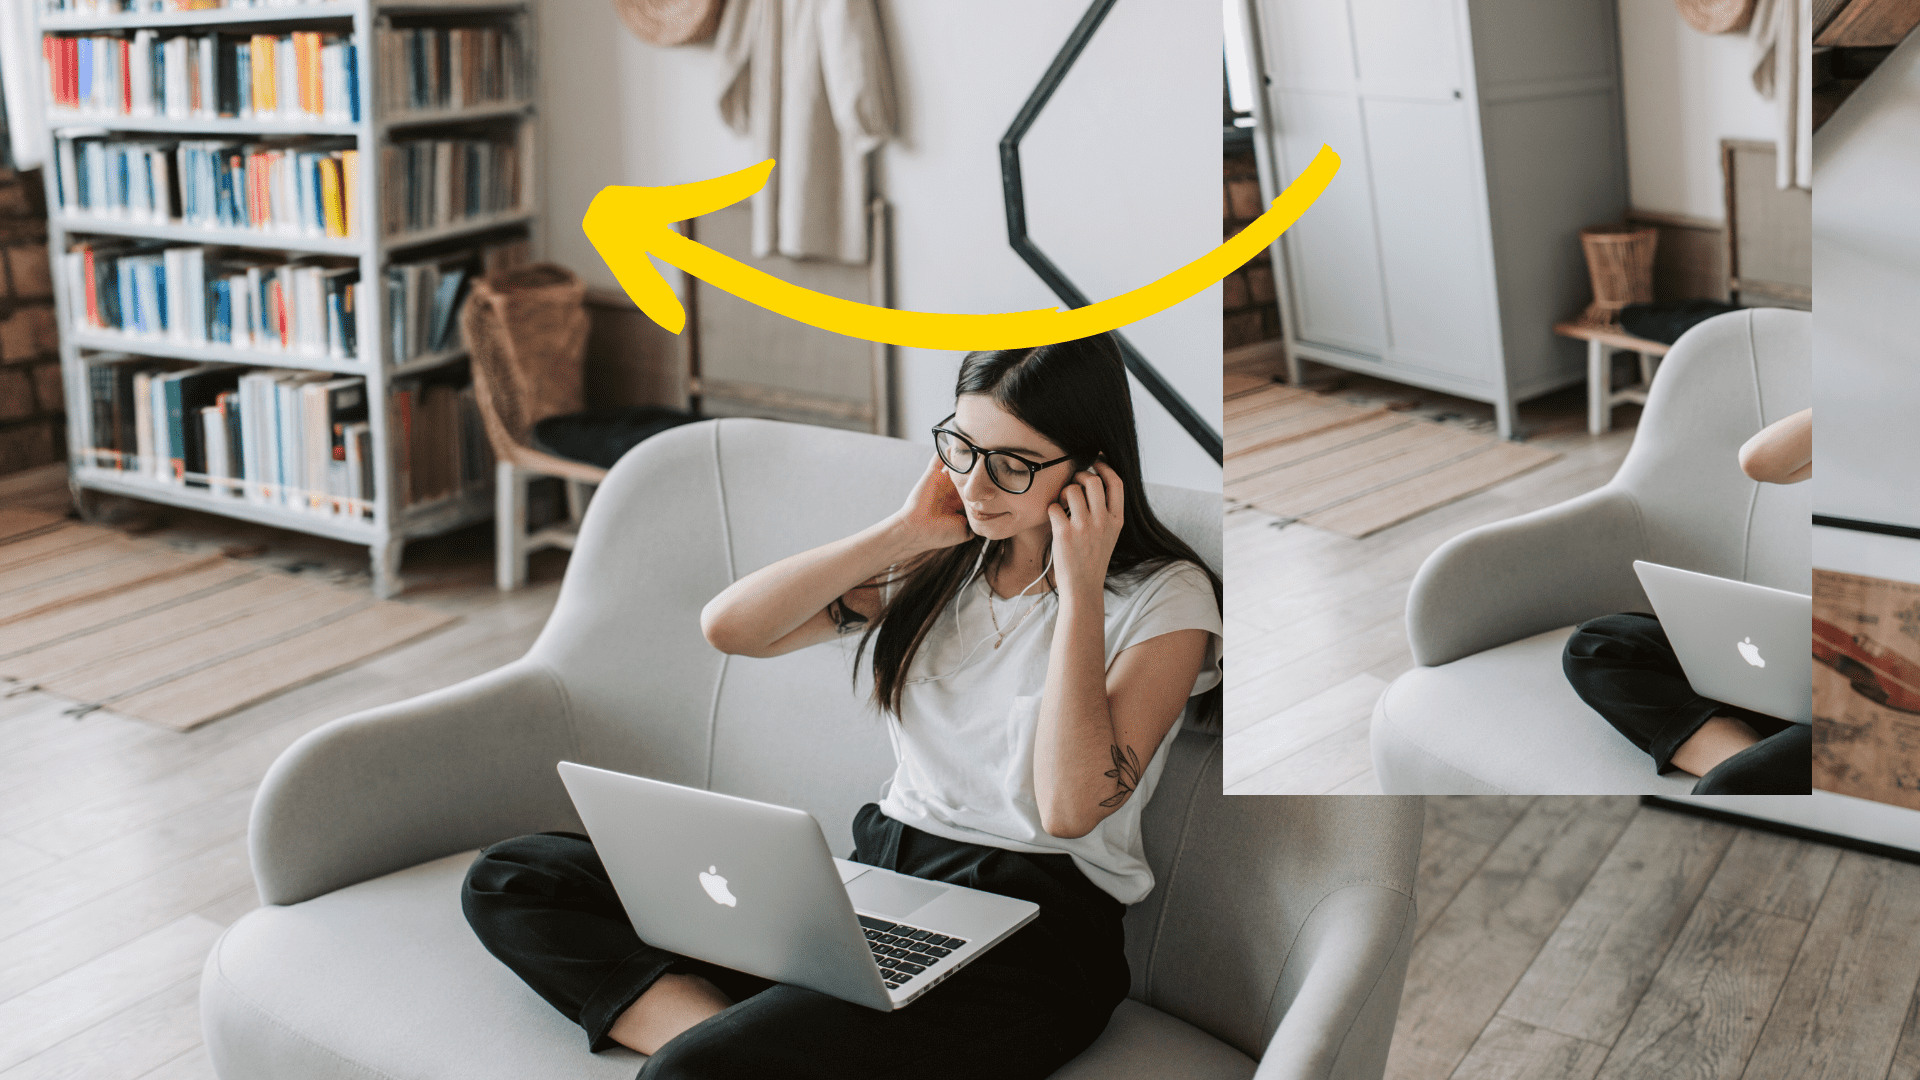
So I used only the photo editor on the following image, and I got the image displayed below.

- I used magic eraser to change the cupboard into a library full of books

- I applied then the X-Pro + filter on the image, from Color Pop filters group.
- Then I applied the auto adjust on the photo, it slightly changed the coloring.
- After that, I applied the auto crop. And the resulting image is displayed below.

Thoughts
This was an overview of the new Canva image editor. If you have anything to say, or want to add information about any of the features, I would be happy to hear from you. Just drop your idea in the comments below 🙂.