
How to use Frames in Canva?
Post by Amina Delali, January 04th,2023
What are Frames?
A frame is a design element, that you can access from the elements tab at of the side menu bar. And it allows you to add a shape to your picture. It will encapsulate the picture inside a particular form. So, you can use it to create a circular photos, as well as a star shaped photo.
How to use Frames in Canva?
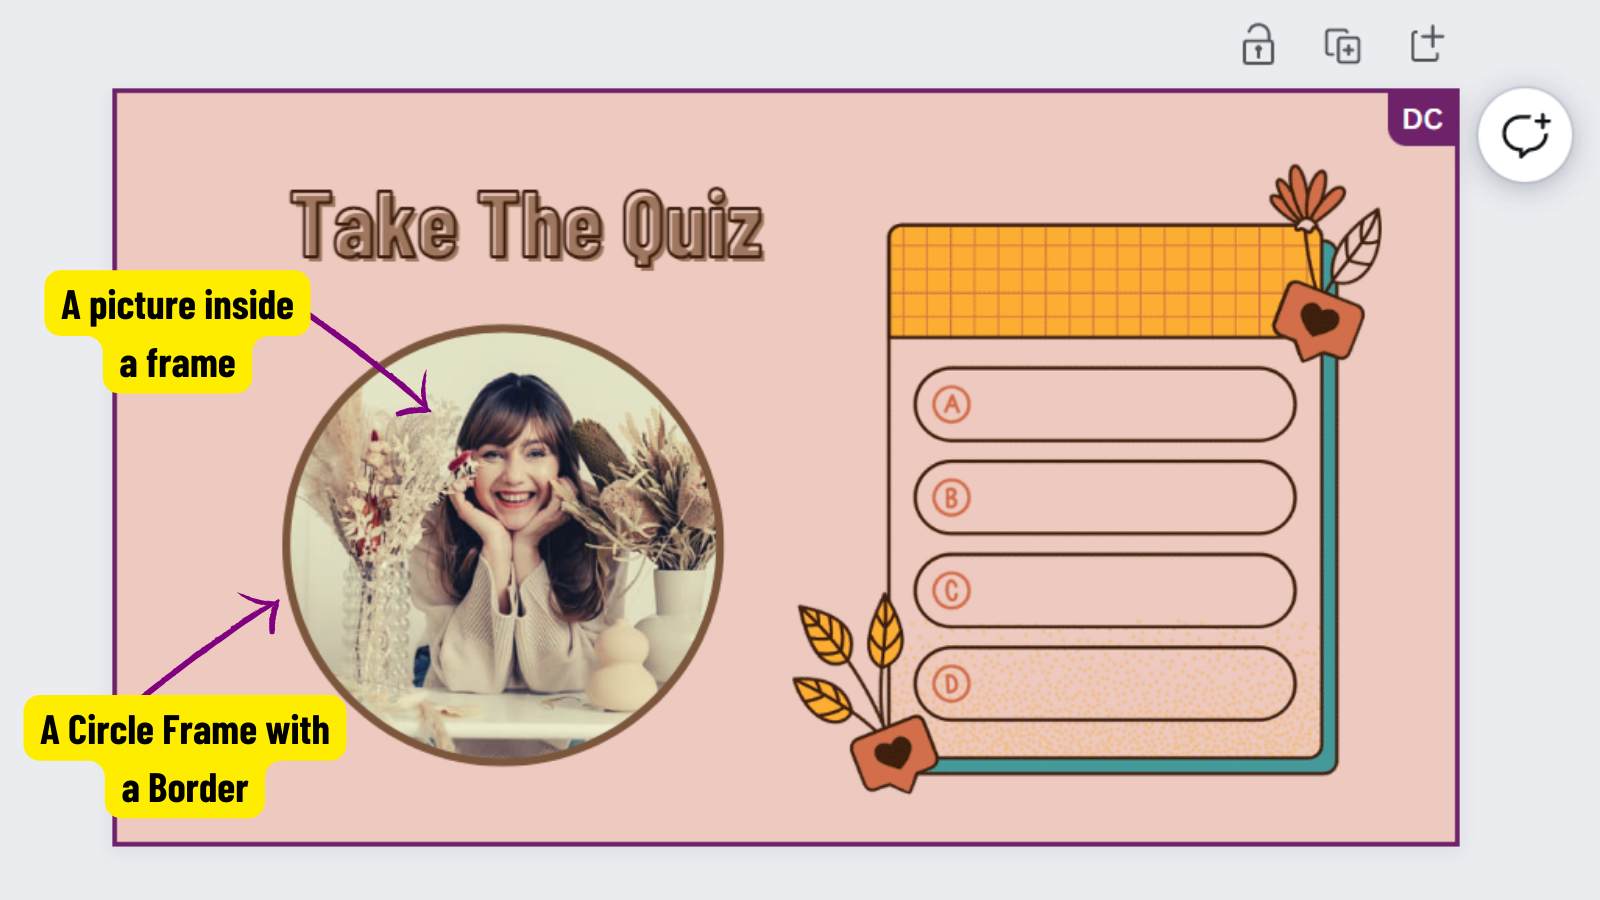
I am going to describe a regular scenario of creating a design using a frame. I am going to use it to create a twitter post (the one displayed above):
- First of all, you have of course to create a new design. You click on the Create a design button; and since we are creating a twitter post, write on the search bar the word: twitter, then select from the generated list: twitter post.
- Name your design. For example: Frames
- Now, you can either start with a Template, or with an empty canvas. We are going to start with an empty canvas.
- Now you can add design elements to the canvas. Since today is a Trivia day, we are going to use it as a theme for our design:
- We will add a graphic element. On the side menu bar click on the elements tab, then on the search bar, type in the word "quiz". Click on the Graphic tab, then select a graphic and add it to your canvas by clicking on it. You can resize it, and change its position, in a way that it will fit your design.
- Change the color of the background, so it fits one of the graphic colors. Just click on the empty area of the canvas, click on the background color button, and select one of the suggested colors.
- Now, we can add a text title, like "Take the Quiz" for example. On the side menu bar, click on the Text Tab, then click on the Add a text box button. Now, reposition your text on the canvas, write the text, set the desired font, and resize it. You can adjust its position again. You can also change its color, by clicking on the text color button, and selecting one of the suggested colors. You can apply an effect on your text, by clicking on the Effects button, and selecting the effect you want. I selected the splice effect.
-
We want to add a picture of a smiling woman, but we want it to be in a circular shape. So for this, we are going to use a frame:
- Click on the elements tab from the side menu bar.
- Click on the search bar the word "Frame".
- Above the search results, there is a menu. Click on the All button.
- On the first row, there is the list of Frames, click on see all.
- We want to use a circular frame with a border. Above the listed available frames, there is also a menu, click on Border. Then click on Circle Border.
- From the results, click on the desired frame to add it to your design. Then you can change its position.
- To add the picture, click on the Pexels tab from the side menu, then on the search bar type for example: "smiling woman". From the results, select the one you want by clicking on it.
- On the design canvas, click on the picture, drag it, and hover it above the frame. It will automatically be incorporated.
- You can resize it again, and reposition it if you want. You may want to change the border color of the frame. Just click on the frame, then click on the color button, and select one of the photo colors suggested on the side menu.
- To change the appearance of your photo, and apply a filter. Click on the photo frame, and then on the edit image button. From the side menu, in the category Filters, click on see all, and click on the filter you want. For example, I selected the Epic filter.
- Now, you can download your design, or simply share it on twitter by clicking on share, then on the twitter icon.
Thoughts
There are infinite uses possibilities with frames. They are really amazing, and they can save you a lot of time and headaches. But you have to test them, and explore their different categories. So when the time comes for you to create a design, you will know exactly which type of frame you will use and how to use it.